Adding and Managing Printers
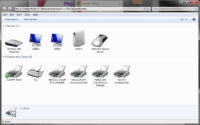
In Windows 7, to add a new printer, or to change your default printer, start at the Start Menu. Click on the "Devices and Printers" item. A window will open filled with icons representing your various printers, keyboards, display and other devices (see Figure 1).
There should be some pre-istalled printers listed, such as the CutePDF virtual printer. One of these ought to have a green check mark on the icon - this is the default printer. If you want to change the default printer, right-click on the icon of your desired printer and select "Set as default printer". Close the window, and you're done.
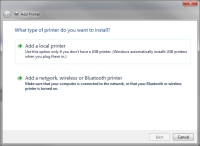
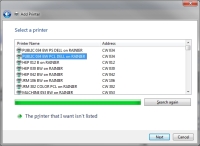
To add a new printer, click on "Add a printer" on the taskbar near the top of the window. A new window will open and ask you if you want to add a local or network printer (Figure 2). You will probably be adding a network printer, so click on that option. A new list of all of our network printers will appear (Figure 3). The list can be sorted by the printer's name or the printer's location (titled "Address" for some reason).
Most of the printer names are obvious descriptions of the printers but there are two potentially confusing things you may notice.
First, some printers have both a "PCL" and "PS" identity. This refers to the "Printer Control Language" or the "PostScript" printer language. Usually you should use the PCL identity. If you are using Linux or generating PostScript via TeX, then you may want to use a PostScript printer.
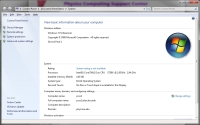
Second, some printer names begin with "x64". Those are the printer device drivers for 64-bit computers. You need to use these if you have an older 64-bit computer; Windows 7 handles this automatically and invisibly to the user. To discover if you have a 64-bit computer, right-click on your Start Menu "Computer" icon and select "Properties". The system information window willl open (Figure 4). Halfway down the window, your "System Type" will be either 32- or 64-bit.
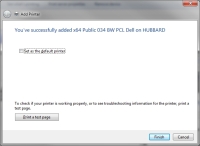
Let's say that you want to add the black-and-white Dell printer found in CW038 (probably our most popular printer). Its full name is "Public 038 BW Dell on SHASTA" and is shown as being in "Cardwell 038". Select that name, and then click the "Next" button. The computer will connect with the printer, then display a "successfully added" message. Click the "Next" button again, and you have the option of making this new printer your default (Figure 5). Check or uncheck the box as you like.
To verify that the printer is working for you, you may want to click the "Print a test page" button. That will print a standardized page and prove that you can use the printer. You can safely skip this step. Click the "Finish" button, close the "Printers and Devices" window, and you're done.
When using our printers, please be sure to use the black-and-white devices whenever possible. Toner, even black toner, for the color printers is much more expensive. Also please use duplex (double-sided) printing when you can. Doing that obviously halves our paper cost and helps save the forests.
Finally, you can learn more about printer management in general at the Microsoft Windows 7 Getting Started With Printing page.
