Mapping Network Drives
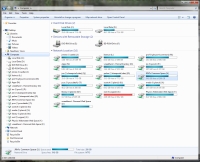
Physics department computer users should get their various disk spaces on our servers automatically mapped to a drive letter in the Windows Explorer. Knowing how this is done manually is still a valuable skill (especially for laptop users).Mapping your research group file space is a good example of the process for mapping drives in general. I'll use a JRM group as an example here. In the Windows Explorer, go to the "Tools" menu and choose "Map Network Drive" (if you don't see the menu bar, you'll first need to go to the "Organize" bar, chose "Layout" and select "Menu bar"). In the text box labeled "Drive" pick an unused drive letter (traditionally "J:" for research groups). In the "Path" box enter \\castle\jrmres\xx\, where "xx" should be the abbreviation for your group ("ib" for Itzik's group, for example). Ignore the "Connect As" box, and check the "Reconnect at Logon" box. This will guarantee that this connection remains a permanent one. Click "OK" and you're done.
The general syntax of the address is \\machine-name\directory-name. Hence, when I map a drive on my PC, it's \\wigner\dvd, where "Wigner" is my PC's name and "dvd" is the share name that I gave to my removable media DVD drive.
By convention, we always map drives L, M, and N as system drives. As noted above, J is for the research group's data; O is the user's home space (for both Windows and Linux); S is the shared research group general file space; and Z is for the user's personal web site. Additional drives may be mapped for system support and for access to shared group files. You should ask your fellow researchers or PCSC to get the proper addresses.
On rare occasions, laptop power-saving systems may aggressively monitor network connections and delete network drives that are temporarily unavailable. If you find this happening to you, contact us at PCSC and we can fix it for you.
Finally, you can learn more about drive mapping in general at the Microsoft Windows 7 Help page.

