Customizing Windows
Windows offers may opportunities for the user to customize the look-and-feel of the desktop, Start menu and other aspects of the user experience. The default appearance of Windows is very simplified, so anyone logging into a new PC for the first time ought to take some time to do that customization. This tutorial is your guide to that process.
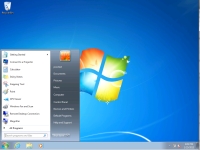
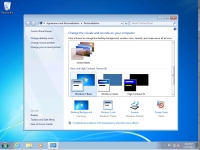
Figure 1 shows the default appearance of the Windows 7 desktop and Start menu. We will begin with the desktop. Right-click in any blank place on the desktop, and choose "Personalize" from the context menu. The Personalization control panel appears, as show in Figure 2.
Along the bottom of this control panel you'll see four categories: desktop, color, sound, and screen saver. We will visit each in turn. You should already be looking at the available desktop backgrounds. Near the top of the backgrounds gallery is a group called "Aero Themes". "Aero" is the name of the spiffy Windows interface that allows cool special effects on your display. Selecting one of these backgrounds will automatically activate Aero. Very old computers may not be able to handle Aero; if you have issues follow the "Troubleshoot problems..." link at the bottom of this control panel. For our purposes, just select the Aero "Windows 7" Aero theme. The desktop wallpaper should change as soon as you select the theme, and you should notice the "chrome" of your windows become translucent. That means Aero is working.
You can select any of the many wallpaper designs in the gallery, or you can use your own image. To select your own, click on the "Desktop Background" icon at the base of the window. A new window will let you see the same galleries or to browse for a file with your own favorite image in it. You can also choose how to scale the image to fit your screen. When you're happy, click "Save changes" to return to the control panel.
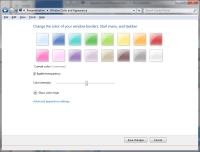
Back at the categories icons, select "Windows Colors". A palette appears with a variety of colors that you can assign to the title bars of your windows (Figure 3). The default color is "Sky" blue. I'm partial to "Slate" gray, myself. Pick a color, then make sure that "Enable Transparency" is checked. Below that check box is a slider that controls how transparent the "chrome" of your windows will be. This is a "live" effect, so you should see things change as you fiddle with the slide. When you're happy, click the "Save Changes" button. If you're very particular about the detailed appearance of your windows and text, following the "Advanced appearance settings" link. That brings up a highly detailed control panel. You're on your own if you want to use this!
Learn more about the Aero or about the desktop in general at the Windows web site.
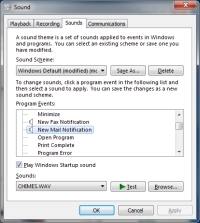
You should be back in the main Personalization control panel. Now click on the "Sounds" icon. A small list box will open showing all the different events that can play a sound (Figure 4). Your first option could be to simply choose from the provided sound schemes. These are listed in the gray box labeled "Sound Scheme". You preview the sounds in a scheme by selecting the scheme in the gray box, then selecting an event from the list, and clicking the "Test" button with the green "Play" icon on it.
You can modify any particular event's sound if the one from your preferred scheme isn't satisfactory. As an example, we'll change the sound made when you get new mail. Scroll down the list until you find "New Mail Notification". Select that, and at the bottom of the window the name of the sound file associated with that even appears (if any). Clicking the "Test" button next to that file name again lets you preview the sound. The "Browse" button lets you look for a new file. If you have Office installed, there is a "Media" folder with a path like "C:\Program Files (x86)\Microsoft Office\Office14\Media". There are some nice sound snippets here, or you can go find your own. I like the "Chimes" myself. You can preview these sounds right out of the selection window by right-clicking on one and choosing "Play". When you have chosen, click "Open". You're back in the sounds list now, and can continue to choose more sounds. When you're finished, click "OK".
Microsoft provides more details about audio and video configuration at their web site.
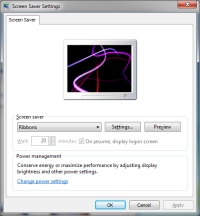
The final category icon in the Personalization control panel is for screen savers and power settings. Clicking on that opens the screen saver menu (Figure 5). There's a list of choices here, and each one shows a little preview. Pick one that suits your fancy; if there are any user-adjustable controls, they will be found using the "Settings" button. A full-screen preview can be had using the "Preview" button; clicking the screen during the preview brings you back to the menu. Finally, pick the time you want your machine to wait before activating the screen saver from the "Wait" box. For our departmental machines, this is already set for you (per University security and power-saving rules).
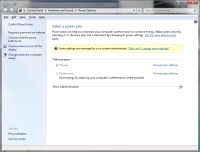
At the bottom of the screen saver menu window is a block labeled "Power Management", with a link to those settings. Click the link. The Power Management control panel will now open (Figure 6). On the Physics machines this is also locked down, but it certainly won't be on your laptop.
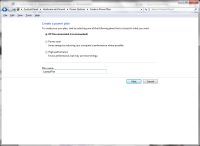
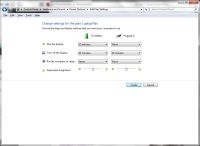
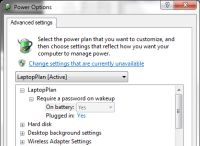
The best way to customize your power plan is to click the "Create a power plan" link on the left-hand menu of this control panel. This lets you create a new plan with its own name, based on one of the existing plans (see Figure 7). I've called our example "Laptop Plan". Click "Next". You now have a set of controls for dimming the display, turning off the display, or putting the computer to sleep (Figure 8). You can specify the behavior you want when the system is on batteries or on wall power independently. Choose your settings, then click "Create". You return to the previous control panel, now showing your new plan's name. If you want more detailed control, click on "Change plan settings" next to your new plan name. This returns you to the settings page, but now there is an "Advanced settings" link. Click it, and yet another window opens, this one with a long, detailed list of options (Figure 9). You're on your own here.
More information on power management is available via the Microsoft Windows help site.
Other configuration options are available from the control panel, as well. Long-time users of Windows may have come to expect certain system-level desktop icons to be present. Follow the "Change desktop icons" link to pick which of these appear, or even to change their appearance. You may also change the behavior of your mouse and the pointer icons by following the "Change mouse pointer" link. Laptop users may want to try adding "pointer trails" to make their pointer more easily visible; this setting is found under the "Pointer Options" tab of the "Mouse Properties" window. Lastly, you can also add a photo or avatar of yourself under "Change your account picture". This makes it easier to manage different personal accounts on a shared computer, or lets you add a personal touch to your otherwise soulless machine.
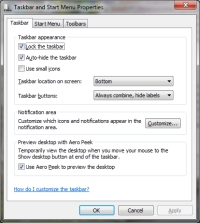
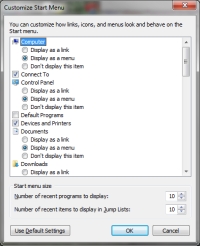
That completes the desktop personalization part of our customization. We will now turn to the Start Menu and Windows Explorer. Close the Control Panel window if it is still open. Right-click on the Taskbar at the bottom of the screen, and select "Properties". A tabbed window of "Taskbar and Start Menu Properties" appears (Figure 10). I won't attempt to describe all of the many options available here, just a few of the highlights. On the "Taskbar" tab, for instance, you can choose to auto-hide the Taskbar if you don't want it littering the bottom of your screen all the time. Under the "Start Menu" tab, click the "Customize" button. A long checkbox list will open showing all the Start Menu options (Figure 11). Most of these determine whether a link appears at the top level of the Start Menu, and whether that link is expandable as a menu. I enjoy the convenience of displaying most of these as a menu, myself. I don't bother with the Favorites, Default Programs, or Newly-Installed Programs, though. I like having the "Run" command line handily available (even though the "Search" box now does the dame thing), and if you know what you're doing having the System Administration menu always handy is nice. You'll definitely want to sort the Start Menu alphabetically. Work your way down the list, make your choices, then click "OK". The final tab, "Toolbars" allows the display of secondary tool sets on the Taskbar. I personally don't use any. When you've reviewed all three tabs, click "OK" to complete this section.
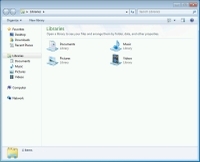
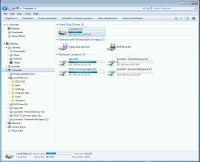
Now open the Windows Explorer by clicking on the file folder icon on the Taskbar (note that "Windows Explorer" means the system file manager, not to be confused with the "Internet Explorer" web browser). By default, this file explorer is rather spare-looking and not very interactive (Figure 12). To improve on this, start by clicking the "Organize" link near the top of the window. The "Layout" item that appears has a sub-menu of items visible in the explorer. Click "Menu bar", and the menu bar will appear above the layout bar. Go to the "Tools" menu, and choose "Folder options". On the first, "General" tab of this window, near the bottom, are two checkboxes for controlling the left-hand navigation pane of the explorer. Check both of these so that all folders get displayed, and so they automatically expand to show the sub-folders as you navigate. Now click the "View" tab, and another long list of items displayed by the explorer appears.
By default, Windows hides file types from the full filenames, and completely hides system files. Intended to simplify things for novice users, it instead frequently creates confusing situations. I change this to always display the full file path and never hide any files. You may wish to leave "protected system files" hidden, though. That category is more thoughtfully defined. If you choose not to hide these, a warning will appear about them. You will also begin seeing certain hidden files for the Recycling Bin and for icon thumbnails. These appear as somewhat ghost-like icons on the desktop. If you do leave these files hidden, remember that if you ever need to do serious maintenance on your operating system. The final tab in this window lets you configure searching. I usually leave this alone. Click "OK" to exit this window, then go to the "View" menu. Windows usually gives a simple, icon-based view of files. If you crave more information, though, you'll want the "Details" view instead. Choosing "Details" gives you a list of file names, sizes, modification dates, and much more. Right-clicking the column header bar in the "Details" view allows you to pick and choose the information you want to see about files.
At this point, the Windows Explorer will look something like Figure 13. When you're finished, click "OK', and we're all done with our basic Windows customization.
Finally, use the specific links in the text above, or follow these links to learn more from Microsoft about Windows 7 personalization and customization or about Windows 7 in general.
